By the end of this guide, you’ll know exactly what to gather, clear, and check before a solar site assessor arrives — and you’ll understand what each item is for, so the visit produces a useful quote rather than a vague estimate. A site assessment typically runs 45 to 90 minutes, and the quality of that visit depends heavily on what you’ve prepared in advance. Most of the work happens before the assessor rings the doorbell.

What a Site Assessment Is (and Isn’t)
An assessor — sometimes a sales rep with technical training, sometimes a dedicated site surveyor — visits to confirm four things: usable roof or ground space, structural condition, shading exposure, and electrical capacity. They are not there to finalize your design or hand you a binding quote on the spot. That comes later, after the data is processed.
Understanding this shapes your preparation. The assessor needs access, information, and honest answers. Missing any one of those pushes the real quote back by weeks.
Step 1: Collect 12 Months of Electricity Bills
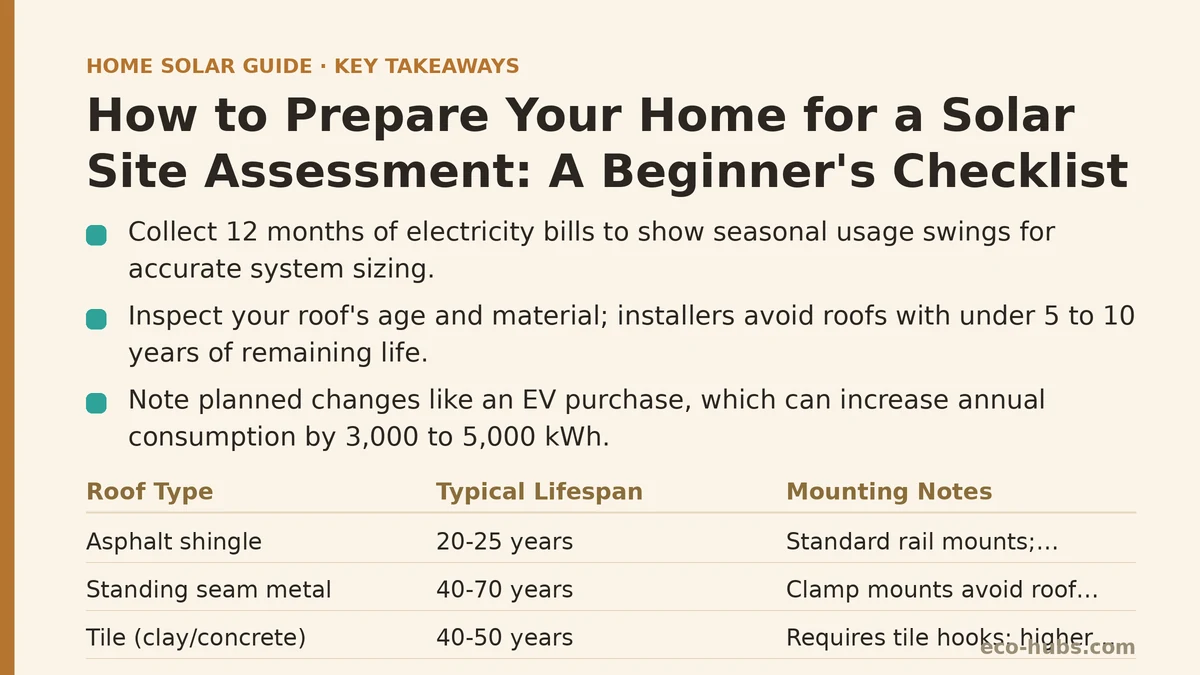
This is the single most important item, and it takes the longest to assemble. Pull together a full year of utility statements — most utility portals let you download 12 to 24 months of usage history as a single PDF. If you’ve only lived in the home for part of that period, gather whatever exists plus any records from the previous owner if available.
Why the full year? System sizing depends on seasonal swings. A homeowner who uses 900 kWh in April and 2,100 kWh in August needs a very different system than the annual total alone suggests. Assessors look for the peak summer and winter months to judge whether battery storage or net metering makes more sense for your usage pattern.
Checklist:
- Log into your utility account and download 12 months of statements
- Note whether usage is measured in kWh or billed in dollars only
- Record your current rate plan (flat, time-of-use, tiered)
- Note any planned changes — an EV purchase, a heat pump install, a home addition
That last item matters more than many homeowners expect. Adding an EV typically increases household consumption by 3,000 to 5,000 kWh per year, which can shift a recommended system size by 20% or more.
Step 2: Walk Your Roof and Note Its Condition
Before the assessor arrives, do your own visual sweep — from the ground with binoculars is fine, and safer. You’re looking for three things: the roof’s approximate age, its material, and any visible damage.
Roof age is the make-or-break detail. Solar panels commonly carry 25-year performance warranties, and most installers won’t mount on a roof with less than 5 to 10 years of remaining life. If your asphalt shingles are 18 years into a typical 20-to-25-year lifespan, a reputable installer will often recommend reroofing first — and it’s far cheaper to do that before panels are bolted down than after.
| Roof Type | Typical Lifespan | Mounting Notes |
|---|---|---|
| Asphalt shingle | 20–25 years | Standard rail mounts; common and inexpensive |
| Standing seam metal | 40–70 years | Clamp mounts avoid roof penetrations; often preferred |
| Tile (clay/concrete) | 40–50 years | Requires tile hooks; higher labor cost, more breakage risk |
| Wood shake | 20–30 years | Fire code may restrict; some jurisdictions discourage solar |
| Flat/rolled membrane | 15–25 years | Ballasted or adhered mounts; drainage must be verified |
Also note the pitch and orientation. A roof facing roughly south (in the northern hemisphere) with a pitch between 15° and 40° is generally the easiest case. East- and west-facing roofs still work but produce somewhat less and more spread-out output across the day.
Checklist:
- Estimate roof age from purchase records or inspection reports
- Identify the material and note any cracked, lifted, or missing pieces
- Photograph any existing damage for your own records
- Note the general direction the main roof planes face
- Check gutters and downspouts for clogs or detachment
Step 3: Map the Shade Around Your Property
Shading is where self-assessment helps most. The assessor will bring a shade-measuring tool — often a handheld device that photographs the sky and estimates solar access — but your own observations add context that a single visit can’t capture.
Walk the yard at three times: roughly 9 a.m., noon, and 3 p.m. Note which trees cast shadows on the roof and at what times. Deciduous trees lose leaves in winter, so their summer shade may not be as limiting as it first appears. Evergreens are the opposite — their shade persists year-round and matters more.
A rough rule of thumb: a tree casting shade on more than about 20% of a roof plane during peak sun hours (roughly 9 a.m. to 3 p.m.) will measurably reduce production. Shade on 50% or more often pushes the economics toward not installing at all, or toward a smaller system on an unshaded section.
If X, then Y:
- If shade comes only from deciduous trees, note this — the assessor may still recommend full roof coverage.
- If shade comes from a large evergreen or a neighboring building, ask about microinverters or power optimizers, which reduce losses from partial shade.
- If shade covers most of the roof, ask about ground-mounted or carport options instead.
Checklist:
- Note tree species and canopy size within 30 feet of the roof
- Record shade patterns at 9 a.m., noon, and 3 p.m.
- Ask about any local tree ordinances before planning removals
- Check for future shading risks — a neighbor’s fast-growing tree, new construction planned nearby
Step 4: Locate and Photograph Your Electrical Panel
The main electrical service panel is the second most important item after your bills. The assessor needs to see its amperage rating, its age, and how full it is with breakers.
Most modern homes have a 200-amp panel, which generally accommodates a residential solar system without upgrades. Homes with 100-amp service may require a panel upgrade, which commonly costs $1,500 to $3,000 depending on region and code requirements. That’s a real number worth knowing before the visit.
Open the panel door — carefully, and only if you’re comfortable doing so — and photograph the inside with the breaker labels visible. If you’re not comfortable, just photograph the outside and note any labels you can read. Do not remove the dead front cover; that’s for a licensed electrician.
Checklist:
- Photograph the panel exterior with the amperage rating visible
- Photograph the breaker layout with labels
- Note the panel’s approximate age and manufacturer
- Note the distance from the panel to where the inverter would likely go
- Check for any existing subpanels
Step 5: Identify and Clear Access Points
Assessors need to reach the roof, the electrical panel, the attic (sometimes, to check structural framing from below), and any meter location. An hour of clearing before the visit saves hassle during it.
- Clear a path through the garage or basement to the electrical panel
- Trim back any shrubbery blocking the meter or the panel’s exterior wall
- If attic access is needed, clear stored items away from the hatch
- Make sure gates are unlocked and pets are secured
- Note any skylights, vents, or chimneys on the roof — these limit usable panel area
Also check for obstructions the assessor wouldn’t otherwise know about: a satellite dish on the roof, a roof-mounted swamp cooler, or a chimney that casts a shadow. Each one removes usable mounting space, and mentioning them saves a return visit.
Step 6: Decide on Your Goals Before the Visit
The assessment produces better results when you’ve already thought about what you want from solar. The assessor will ask, and a clear answer changes the recommended design.
If your priority is lowest upfront cost, ask about a smaller system covering your baseline usage and relying on net metering for the rest.
If your priority is backup power during outages, ask about battery storage — and note that this typically adds $8,000 to $15,000 to the project, so it’s worth deciding before the design stage.
If your priority is maximum independence from the grid, ask about full offset sizing and whether your utility’s interconnection rules allow it.
If you’re planning to move within 5 years, ask about how the system affects resale value and whether a leased or financed system complicates a home sale.
Write your top two priorities on paper. Assessors notice the difference between a homeowner with clear goals and one who hasn’t decided — and the resulting quote tends to be more focused as a result.
Step 7: Prepare Your Questions for the Assessor
The visit is your chance to get information that a brochure can’t provide. Bring specific questions and write down the answers.
| Topic | Question to Ask |
|---|---|
| Roof | Based on what you see, is the roof in good enough condition for the panel warranty period? |
| Shading | How much production does the shade you measured typically cost? |
| Electrical | Does my panel need an upgrade, and what would that typically add to the project? |
| Sizing | What production estimate are you using, and what assumptions drive it? |
| Timeline | What’s the realistic time from signing to activation, including permitting and interconnection? |
| Next steps | What do you need from me after this visit, and when will I see a detailed quote? |
For a fuller list, our guide to questions to ask a solar installer before signing anything covers the warranty and contract details worth raising later, once a quote is on the table.
Common Preparation Mistakes and How to Recover
You forgot the utility bills. Ask the assessor if they can proceed on estimates and send the bills afterward. Many will, but the quote will be provisional until real usage data arrives.
The panel is behind stored boxes. Don’t panic. The assessor can usually work around clutter, but a clear panel yields a more reliable read on available breaker space.
You discover the roof is older than expected. This is a common and important finding. Ask the assessor to quantify the cost of panel removal and reinstallation if a reroof is needed during the system’s life — typically $1,500 to $3,000 in labor — so you can compare reroofing now versus later.
You’re not sure who owns the roof (shared wall, HOA, condo). Raise this before the appointment. Some installers will pause the process until ownership or HOA approval is confirmed.
Step 8: Confirm Logistics for the Day Of
The assessment itself is short. Make it count.
- Confirm the appointment window and who needs to be home
- Ensure the assessor can access the roof safely (no ice, no active leaks)
- Have your bills, panel photos, and notes gathered in one folder — digital or paper
- Set aside the full window; assessments can run long if the roof is complex
- Ask for the assessor’s name and the follow-up timeline in writing
After the visit, most installers deliver a detailed proposal within one to two weeks. If you haven’t heard back in that window, a polite follow-up is reasonable.
Quick Reference: Pre-Assessment Checklist
- 12 months of utility bills downloaded
- Current rate plan and planned usage changes noted
- Roof age, material, and condition assessed from the ground
- Shade mapped at 9 a.m., noon, and 3 p.m.
- Electrical panel photographed with amperage visible
- Access paths cleared to panel, attic, and meter
- Roof obstructions noted (skylights, vents, dish, chimney)
- Top two priorities written down (cost, backup, independence, resale)
- Questions for the assessor prepared
- Appointment logistics confirmed
What to Do Next
Start with Step 1 today — log into your utility account and download a year of statements. It’s the item that takes the longest and unlocks the most value from the visit. Then set a date to walk your roof line from the ground and note your shade patterns at three times of day. That’s two hours of work, and it will make the assessor’s visit roughly twice as productive.
Which step is most uncertain for your situation — the electrical panel, the roof age, or the shading picture? Note where you’re starting from and that will help you decide which questions to prioritize when the assessor arrives.
Related guides: Solar Panel Installation Process Step by Step: What Happens, How to Compare Solar Installer Quotes for an Apples-to-Apples Decision, and DIY Solar Installation: Is It Worth Attempting.
🔗 Recommended Reading
- How to Size a Solar System for Your Home: A Beginner's Step-by-Step Walkthrough
- Solar Panel Monitoring Apps: A Setup Guide for Beginners
- How to Read Your Electricity Bill After Solar: A Line-by-Line Walkthrough
- Solar Incentive Paperwork: Common Filing Mistakes That Delay Your Rebate
- Home Battery Sizing Mistakes That Lead to Blackout Regret