A widespread belief is that solar installation mistakes come down to bad equipment or dishonest installers, and that a careful homeowner who picks a reputable brand will avoid the problem. That framing misses most of the actual risk. The majority of costly solar mistakes are design and process errors — an oversized system, panels placed where afternoon shade wins, a production estimate built on optimistic assumptions — and they are made by well-intentioned homeowners and qualified installers alike. The mistakes tend to be invisible on the day of installation and only surface months later on a utility bill or an inspection report.
What follows is a sequential guide. Each step covers one category of mistake, what it typically costs, and how to avoid or recover from it.
Step 1: Confirm Your Usage Data Before Sizing Anything
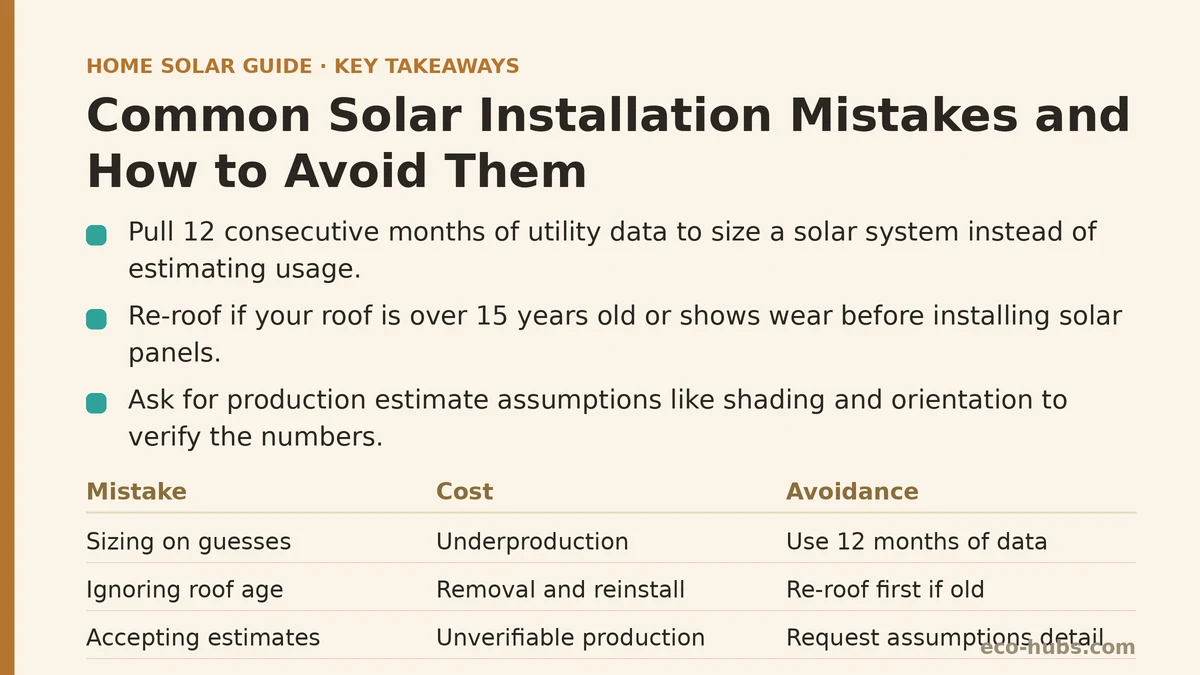
The single most common mistake is sizing a system against a guess rather than against recorded consumption. Homeowners often estimate their usage from memory, which tends to understate summer cooling loads and winter heating loads, and installers working from that estimate may propose a system that underproduces in the months that matter most.
What to do: Pull 12 consecutive months of utility statements, ideally covering a full seasonal cycle. Many utilities provide annual usage summaries in kilowatt-hours through the account portal at no cost. If your provider offers hourly or 15-minute interval data, request it — interval data reveals whether your peak usage lines up with midday solar production or happens in the evening after the panels stop generating.
Common mistake within this step: Using only a summer month’s bill as the baseline. A system sized on July consumption can look ideal in a spreadsheet and still fall short across a full year.
If you already have a system and suspect it’s undersized: A production monitoring app compared against your annual consumption figure will show the gap quickly. Retrofitting additional panels is usually possible if the inverter has spare capacity, and considerably more expensive if it does not.
Step 2: Check the Roof Before You Check the Panels
Panels frequently outlast the roof beneath them. A typical panel carries a 25-year product warranty; an aging asphalt shingle roof may have five to ten years of service life left. Installing solar on a roof that needs replacement in that window means paying for removal and reinstallation later — a cost that commonly runs several thousand dollars depending on system size and local labor rates.
Evaluation checklist before signing:
- Roof age and remaining expected lifespan
- Existing leaks, soft spots, or visible granule loss
- Number of roof penetrations the installation will add
- Whether a re-roof could be bundled with the solar project to save on labor
Decision branch: If the roof is more than 15 years old or shows active wear, re-roof first. Bundling the two projects usually costs less than doing them separately, and it avoids the removal-and-reinstall problem entirely.
Step 3: Do Not Accept a Production Estimate Without Its Assumptions
Production estimates vary widely between proposals for the same roof, and the spread is not driven by panel quality. It comes from the assumptions behind the number: shading, panel orientation, tilt, local weather averages, and inverter efficiency. An estimate presented as a single annual figure with no supporting detail is not verifiable.
Worth requesting directly: A shading report (many design tools generate one), the assumed panel tilt and azimuth, the degradation factor applied over time, and the inverter’s efficiency rating. A production figure in your proposal that exceeds roughly 1,400–1,600 kWh per installed kilowatt per year in most U.S. climates deserves scrutiny — that upper range is achievable in high-irradiance regions and uncommon elsewhere.
Common mistake: Comparing two quotes purely on total system cost per watt without comparing projected annual production. A cheaper system that produces less can cost more per kilowatt-hour over its lifetime.
Step 4: Verify What the Warranty Covers and Who Backs It
Solar quotes bundle several distinct warranties, and the gaps between them are where surprises live. A panel manufacturer’s product warranty covers defects in materials; its performance warranty covers output degradation above a stated threshold. The inverter warranty is typically shorter — commonly 10 to 12 years, extendable for a fee. The installer’s workmanship warranty covers the installation itself, and its duration varies widely, from as little as one year to 25 years.
The gap to watch for: If a leak or electrical fault could plausibly be either a manufacturing defect or an installation error, both warranties may decline to cover it. Ask directly how disputes of that kind are resolved, and get the answer in writing before signing.
Second gap: Installer workmanship warranties are only as durable as the installer’s business. Ask whether any manufacturer-backed coverage would persist independently if the installing company closes.
Step 5: Read the Interconnection Timeline as Part of the Contract
The period from signing to a live system is usually driven less by installation labor than by permitting and utility interconnection approval. Physical installation may take one to three days; permitting and interconnection commonly add weeks to several months depending on jurisdiction and utility workload.
Common mistake: Treating the sales timeline as the activation timeline. If a sales representative quotes a specific “system live” date without mentioning permitting and utility review, that date is likely optimistic.
What to confirm in writing: Who files the permit and interconnection application, which party pays any associated fees, and what happens contractually if approval takes longer than expected. Some contracts include escalation clauses tied to delays; others do not.
Step 6: Inspect Panel Placement for Shade You Already Know About
Design tools model shade from structures and trees, but they depend on the data the designer enters. Chimneys, satellite dishes, a neighbor’s tree that has grown since the aerial imagery was captured, and dormers are among the features that get missed.
Before signing: Walk the roof plan yourself and identify every object that casts a shadow between roughly 9 a.m. and 3 p.m. during the seasons your usage is highest. Ask the designer to re-run the model with those obstructions included, and confirm whether microinverters or DC optimizers are specified for any partially shaded rows. String inverters suffer disproportionately when one panel in the string is shaded; module-level electronics reduce that loss but add cost.
Step 7: Understand Financing Terms Before You Commit
If you are financing rather than paying cash, the headline rate is not the full picture. Compare the annual percentage rate inclusive of fees, check for prepayment penalties, and map the loan schedule against the timing of any federal tax credit you plan to apply to the balance.
A frequent mistake: Assuming the tax credit arrives before the first payment is due. Federal residential clean energy credits are claimed on the tax return for the year the system was placed in service, and the cash typically arrives months into the following year. Homeowners on tight cash flow sometimes take a higher-rate loan expecting to pay it down quickly with the credit, only to discover the timing mismatch. Solar loans designed around the credit sometimes carry higher rates in exchange for deferred payments — confirm the structure explicitly.
Step 8: Keep the Documentation After Activation
The post-installation paperwork is what makes future warranty claims, home sales, and utility inquiries straightforward.
Save and store digitally:
- Final signed contract and any change orders
- Permit approval and final inspection sign-off
- Interconnection approval letter from the utility
- Manufacturer warranty registrations for panels, inverter, and racking
- Installer workmanship warranty document with contact information
- The as-built system diagram and monitoring app login credentials
Common mistake: Losing installer contact details after the company rebrands or is acquired. Note the manufacturer’s direct warranty claim channel as well, since that path survives installer changes.
Quick Reference: Mistake, Cost, Prevention
| Mistake | Typical Consequence | Prevention |
|---|---|---|
| Sizing from estimated usage | Underproduction in peak months | Request 12 months of utility data |
| Solar on an aging roof | Removal and reinstall cost | Re-roof first or bundle projects |
| Accepting an unverifiable production estimate | Inflated payback projection | Request shading report and assumptions |
| Misunderstanding warranty gaps | Uncovered repair cost | Ask how disputes are assigned |
| Ignoring permitting timeline | Delayed activation | Confirm who files and what delays cost |
| Missing known shade sources | Lower-than-projected output | Walk the plan yourself |
| Mismatched loan and tax credit timing | Cash flow shortfall | Model the payment schedule |
| Losing post-install documents | Difficult warranty claims | Store everything digitally |
What to Do Next
Start with Step 1 today: log into your utility account and download the last 12 months of usage data. That single file turns the rest of the process from guesswork into comparison, and it gives you the baseline number every installer’s proposal should be measured against.
If you are already past signing, the same steps still apply in review form — check your production estimate against real output, confirm your warranty documents are on file, and verify that your interconnection paperwork is complete. If you are at the beginning and want help interpreting what a proposal is telling you, share the assumptions you have been given and we can help you work through what to verify next.
Related guides: Common Solar Installer Mistakes Homeowners Should Catch Before Signing, Solar Panel Installation Mistakes Homeowners Regret, and Solar Panel Installation Process Step by Step: What Actually Happens.
🔗 Recommended Reading
- Solar Incentive Paperwork: Common Filing Mistakes That Delay Your Rebate
- Home Battery Sizing Mistakes That Lead to Blackout Regret
- Common Solar Installer Mistakes Homeowners Should Catch Before Signing
- Common Home Battery Storage Wiring and Placement Mistakes to Avoid
- Solar Payback Period vs Cash-on-Cash Return: Which Metric Should Homeowners Use