By the end of this guide, you will be able to identify the specific paperwork errors that most commonly hold up solar rebate and tax credit payments, correct each one before submission, and know what to do if a filing has already been rejected. The delays described here are routine and well-documented, not rare edge cases, and most of them trace back to a handful of recurring mistakes that are entirely avoidable with a bit of upfront checking.
Solar incentives rarely arrive automatically. The federal tax credit, state rebate programs, and utility-level incentives each require their own filing, often with different deadlines, different documentation requirements, and different agencies reviewing the submission. A missing serial number on one form or a mismatched installation date on another can stall an otherwise valid claim for weeks or months. This guide walks through the filing sequence in order, flags the mistakes that cause the most friction at each stage, and explains how to recover if something has already gone wrong.
Before You File: Gather the Documents Every Program Will Ask For
Most delays begin before a single form is submitted. The fastest way to avoid them is to assemble one master folder — physical or digital — containing everything any program is likely to request, so you are not scrambling to locate a document after a deadline has already passed.
The core document set typically includes:
- Signed contract and final invoice showing the full system cost, broken out by equipment and labor
- Proof of payment (cancelled check, bank statement, or financing agreement showing the amount financed)
- Building permit number and final inspection sign-off from your local jurisdiction
- Utility interconnection approval letter
- Equipment specification sheets listing manufacturer, model number, and serial numbers for panels and inverter
- Proof of homeownership or, if applicable, landlord authorization for renters or leased systems
- Your most recent utility bill showing the service address and account number
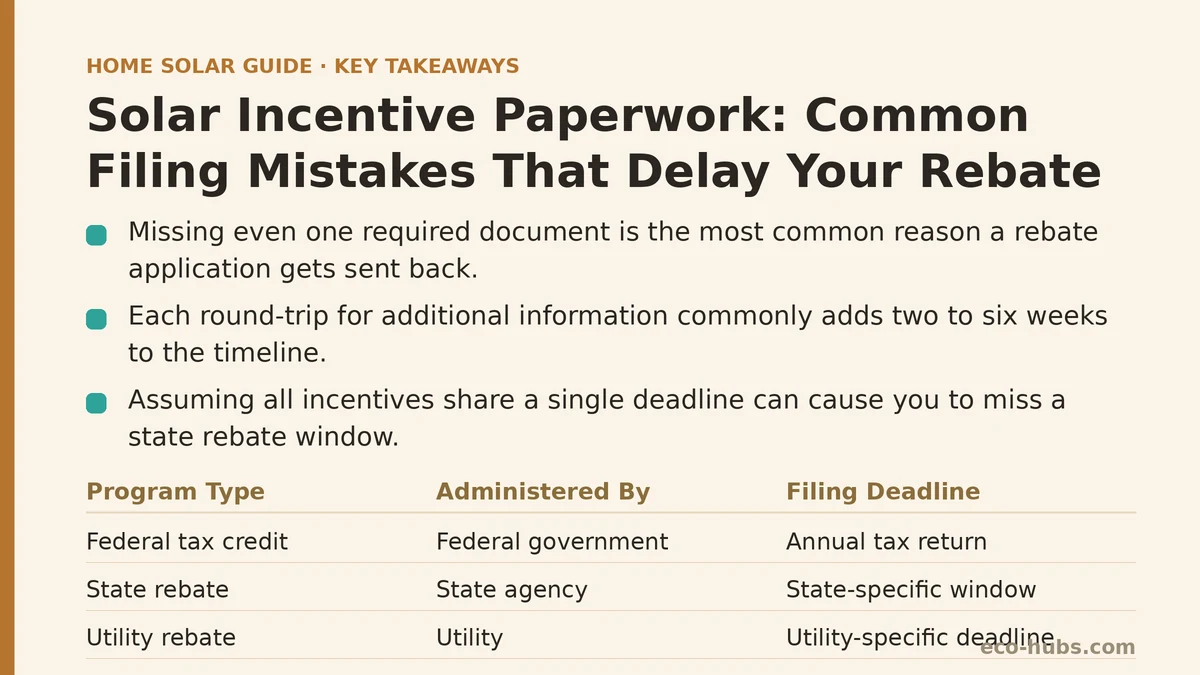
Missing even one item from this list is the single most common reason a rebate application gets sent back. Programs rarely reject a claim permanently for a missing document, but each round-trip for additional information commonly adds two to six weeks to the timeline.
Step 1: Confirm Which Programs You Qualify For and Their Deadlines
Incentive programs differ in whether they are funded by the federal government, your state, your utility, or a combination, and each has its own eligibility rules and filing windows.
The federal residential clean energy credit is claimed on your annual tax return, so its “deadline” is effectively your filing date for that tax year, though the credit applies to systems installed during that year. State and utility rebates are different — many are first-come, first-served and have limited funds, so a system installed in a year when the program is oversubscribed may face a waiting list regardless of how well the paperwork is prepared.
Mistake to avoid: Assuming all incentives share a single deadline. A homeowner who files the federal credit on time can still miss a state rebate window that closed earlier, or lose a place in a utility queue by waiting until the tax return was filed.
What to do: Before installation is even complete, write down each program’s name, administering agency, filing deadline, and required documents in one list. Confirm current rules directly with the administering agency, since program terms and funding levels change frequently.
Step 2: Match Names, Addresses, and Dates Exactly Across Every Form
This is where a large share of delays originate, and it is also the easiest category to fix in advance.
Inconsistencies that routinely cause rejections include:
- The name on the application not matching the name on the utility account (common after a marriage, divorce, or legal name change)
- The service address on the rebate form differing from the address on the utility bill (apartment unit numbers, “Street” versus “St.”, directional prefixes)
- Installation date on the invoice differing by even a day or two from the date on the inspection certificate or interconnection approval
- System capacity listed in kilowatts on one form and in number of panels on another
Programs cross-check documents against each other. A single-character difference in an address can trigger a manual review that adds weeks. Before submitting anything, lay the documents side by side and verify that the name, address, and key dates match character for character.
| Field | Most Common Mismatch | How to Prevent It |
|---|---|---|
| Applicant name | Middle initial, maiden name, or business vs. personal name | Use the exact name on the utility account |
| Service address | Unit number, street suffix, or ZIP+4 differences | Copy the address from the utility bill verbatim |
| Installation date | Invoice date vs. inspection date vs. activation date | Confirm which date the specific program requires |
| System size | kW on one form, panel count on another | Use the nameplate capacity in kW consistently |
| Equipment serials | Panels listed but inverter serial omitted | Include serials for every major component |
| Utility account number | Leading zeros dropped or transposed digits | Copy directly from a recent bill |
Step 3: Verify Equipment Documentation Is Complete and Legible
Rebate and credit programs frequently require proof that the installed equipment meets efficiency or eligibility thresholds, and that the specific units installed match what was approved.
Mistakes that cause holds at this stage:
- Submitting specification sheets for the proposed model without confirming the installed model matches
- Illegible or cropped photographs of equipment labels, making serial numbers unreadable
- Omitting the inverter serial number, which some programs require separately from panel serials
- Using a general product brochure instead of the manufacturer’s official specification sheet
What to do: After installation, photograph each equipment label clearly, in good lighting, with the full serial number visible. Request the manufacturer’s official specification sheets from your installer rather than pulling a generic page from a retailer’s website. Keep a copy of everything you submit, since replacement requests are common.
Step 4: Submit Through the Correct Channel and Keep Proof
Many programs now accept applications only through an online portal, while others still require paper forms mailed to a specific office. Submitting through the wrong channel, or to the wrong office within an agency, is a frequent cause of lost applications.
Checklist before hitting submit or mailing:
- Confirm the program accepts online, mail, or both, and use the correct method
- If mailing, use a trackable method and keep the receipt
- If online, save a PDF or screenshot of the confirmation page and any reference number
- Note the date of submission, since many programs measure deadlines from this point
- Record the name and contact information of any person you speak with about the application
Programs sometimes lose submissions, and without proof of timely filing, a homeowner may be treated as having missed the deadline. This documentation is your recourse.
Step 5: Respond Quickly to Requests for Additional Information
When a program flags an application, it typically sends a request for additional information with a response window — often 30 to 60 days. Missing that window can result in the application being closed entirely, requiring a fresh submission and a new place in any queue.
Mistakes at this stage:
- Treating a request for information as a rejection and abandoning the application
- Responding to only part of the request, triggering another round
- Sending documents through a different channel than the one specified in the request
- Letting the response window lapse during a vacation or busy period
What to do: Treat any communication from the administering agency as time-sensitive. Respond to every point in the request in a single reply, using the channel specified, and keep a copy of what you sent.
Step 6: File the Federal Tax Credit Correctly on Your Return
The federal residential clean energy credit is claimed on your annual tax return using the appropriate form, and errors here can delay the credit by a full year.
Common filing mistakes:
- Claiming the credit in the wrong tax year — the credit applies to the year the system was placed in service, not the year the contract was signed or the deposit paid
- Omitting required supporting documentation or form schedules
- Claiming costs that are not eligible, such as the cost of a roof repair done alongside the installation
- Assuming the credit is a refundable payment — it is a nonrefundable credit, so it reduces tax owed but does not generate a payment beyond your liability in most cases
Because tax situations vary, confirm the specifics with a qualified tax professional rather than relying on general guidance. Program rules and credit amounts have changed over time, so verify current terms with the IRS or a tax advisor for your filing year.
Step 7: Track Your Rebate After Submission
Once submitted, a rebate does not process instantly. State and utility programs commonly take anywhere from four weeks to several months to issue payment, depending on volume and staffing.
If you have not heard back within the stated processing window:
- Contact the administering agency directly, referencing your submission confirmation number
- Ask specifically whether the application is in review, waiting on documentation, or has been closed
- If closed, request the reason in writing so you can address it in a new submission
- Keep a log of every contact, including dates, names, and what was discussed
If a Filing Has Already Been Rejected: Recovery Steps
A rejection is rarely permanent. In most cases, the fastest recovery path is to identify the specific reason cited, correct only that issue, and resubmit through the same channel with a clear note referencing the original application.
Recovery checklist:
- Obtain the rejection reason in writing if it was not provided
- Correct the specific issue rather than resubmitting an unchanged application
- Include a cover note referencing the original submission date and confirmation number
- Confirm whether the resubmission retains the original place in any queue or starts over
- Note any new deadline associated with the resubmission
The most important thing is speed. Many programs have fixed windows, and the longer a corrected application sits, the greater the risk that funding is exhausted or a deadline passes.
What to Do Next
Today, before any deadline pressure sets in:
- Create a single incentive tracker listing every program you intend to claim, its administering agency, deadline, and required documents.
- Assemble the master document folder described at the start of this guide, and confirm every name, address, and date matches across documents.
- Photograph equipment labels clearly and save the manufacturer specification sheets.
- Confirm current program rules directly with each administering agency, since funding levels, deadlines, and eligibility thresholds change.
- Consult a qualified tax professional about the federal credit for your specific situation before filing your return.
Paperwork delays are almost always preventable. The homeowners who receive their rebates fastest are generally the ones who treated documentation as part of the installation itself — gathered early, checked carefully, and submitted with proof.
Where are you in the incentive filing process — still gathering documents, preparing a submission, or responding to a request for more information? Describing your stage can help narrow down which of these steps matters most for your situation right now.
Related guides: Federal Solar Tax Credit: How It Works and Who Qualifies, State and Utility Solar Rebate Programs: What to Expect, and How to Compare Solar Installer Quotes for an Apples-to-Apples Decision.
🔗 Recommended Reading
- Home Battery Sizing Mistakes That Lead to Blackout Regret
- Common Solar Installer Mistakes Homeowners Should Catch Before Signing
- Common Home Battery Storage Wiring and Placement Mistakes to Avoid
- Solar Payback Period vs Cash-on-Cash Return: Which Metric Should Homeowners Use
- Net Metering Credit Rollover Rules: What Happens at Year End