By the end of this post you will know the eight mistakes that most often cost homeowners money on solar tax credits and incentives, how to fix each one if you have already filed, and the specific documents you need on hand before you sit down with your tax preparer. The federal residential clean energy credit alone covers 30 percent of qualifying costs with no dollar cap, which on a $24,000 system is $7,200 — too large to lose to a paperwork error.
Work through the steps below in order. Each one maps to a decision or a document, not a theory.
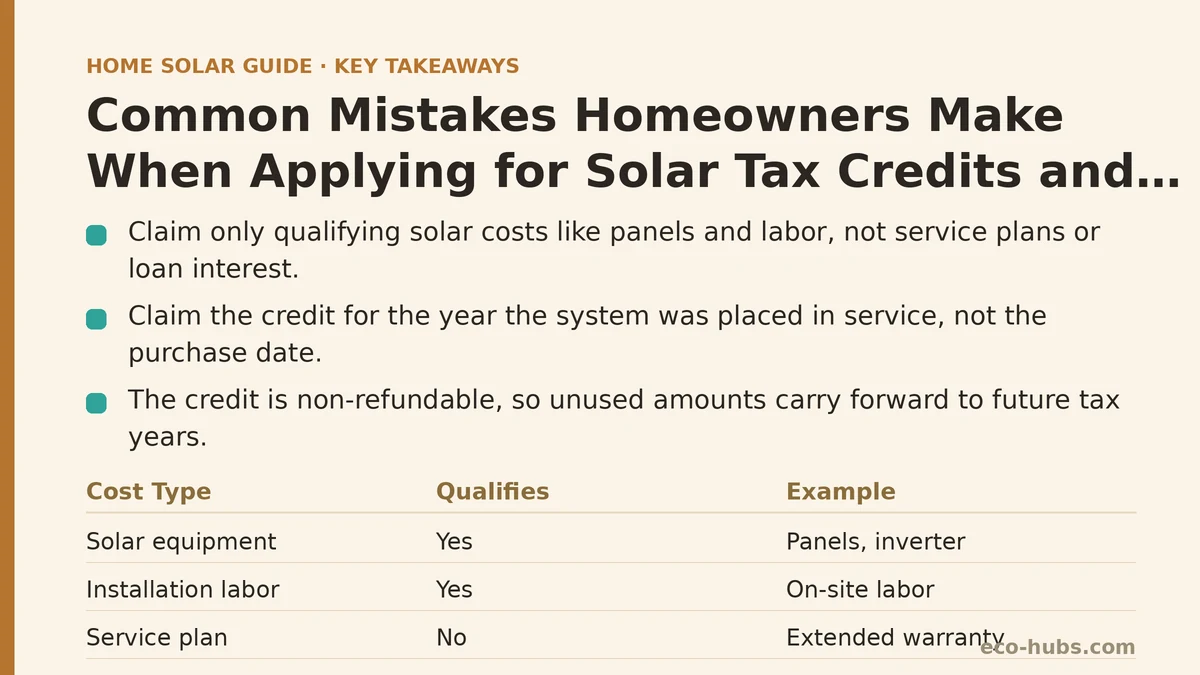
Step 1: Separate What Qualifies From What Does Not
The single most common filing error is claiming the full contract price without checking line by line.
Qualifying costs generally include the panels, inverter, mounting hardware, wiring, permits, inspection fees, and labor for on-site installation. Non-qualifying costs typically include the extended service plan, a roof repair done at the same time, and the portion of a loan’s interest charges.
If your installer bundled everything into one $24,000 number, ask for an itemized breakdown before you file. A $1,800 extended warranty or a $3,500 roof replacement rolled into that total will inflate your claimed credit, and an inflated claim is what triggers a correction letter months later.
Recovery move: If you already filed using a bundled figure, amend your return with Form 5695 and an itemized invoice attached. Amending downward is straightforward; defending an unsupported number is not.
Step 2: Match the Credit Year to the “In Service” Date, Not the Purchase Date
Homeowners routinely assume the credit belongs to the year they signed the contract or paid the deposit. It does not. The credit applies to the tax year the system was placed in service — meaning fully installed and generating power.
A system contracted in October and energized the following March belongs to the later tax year. Claiming it early is one of the cleanest ways to get a return adjusted.
Check your utility’s permission-to-operate letter. That date, not the contract date, is your anchor.
If X then Y: If your system went in service in the final two weeks of December, confirm the activation date in writing with your installer and the utility before you file. A few days’ slip changes which tax year you use.
Step 3: Confirm You Have Enough Tax Liability to Use the Credit
The credit is non-refundable. It reduces what you owe; it does not send you a check for the unused portion.
If your total federal liability for the year is $4,000 and your calculated credit is $7,200, you use $4,000 and carry the remaining $3,200 forward to the next tax year. You can carry it forward as many times as needed until it is used up.
Many homeowners file expecting a $7,200 refund and are surprised when the credit only zeroes out their balance. Knowing your liability number before you file prevents that surprise. Look at last year’s return, line for total tax, as a rough starting point.
Step 4: Stop Assuming the 30 Percent Rate Expired
The residential clean energy credit sits at 30 percent through 2032, with no cap on the dollar amount. Homeowners still operating on outdated information sometimes skip the claim entirely or accept a smaller number a salesperson quoted years ago.
There is no phase-down scheduled before 2033 for residential systems. If a quote you received months ago applied a lower percentage, recalculate before you sign anything.
Step 5: Do Not Overlook State, Utility, and Local Layers
The federal credit is only one layer. Depending on where you live, you may also have:
- A state income tax credit, often capped between $1,000 and $5,000
- A state or utility rebate paid as a direct check, typically $0.10 to $0.50 per watt
- Property tax exemptions that keep the added system value off your assessment
- Sales tax exemptions on equipment at purchase
Each program has its own form, its own deadline, and its own definition of qualifying equipment. A rebate check is generally treated as a reduction in your basis, which lowers the federal credit slightly. State credits, by contrast, usually do not affect the federal calculation.
Action item: Build a one-page table with columns for program name, dollar amount, form number, and deadline. Fill in every row before you file.
Step 6: File the Forms That Are Easy to Miss
The federal credit lives on Form 5695, which flows to Schedule 3 and then to your Form 1040. Most tax software handles this automatically once you enter the cost.
What homeowners miss more often:
- State credit forms that require a copy of the signed contract and the permit
- Utility rebate applications that must be submitted within 60 to 90 days of activation
- Local property tax exemption filings with a county assessor, often due by a fixed date in the spring
- Manufacturer rebates that require serial numbers from the panels themselves, not just the invoice
Missing a utility rebate window is the most expensive of these because the money is gone once the deadline passes. There is no late-filing path for most utility programs.
Step 7: Handle the Solar Loan and the Credit Together
If you financed the system, read the loan terms before you spend the credit.
Many solar loans are structured to be paid down with the credit shortly after the following spring’s tax filing. Some carry a prepayment penalty; many do not. Some require a specific minimum payment before the credit is applied, or they adjust your monthly amount upward.
Three things to confirm in writing:
- Whether a prepayment penalty applies if you pay a lump sum after receiving the credit.
- The exact date the credit is expected to land, based on your filing timeline.
- Whether your lender requires any documentation of the credit after you receive it.
Homeowners who miss the timing sometimes pay an extra several months of interest on a balance they intended to clear immediately.
Step 8: Keep the Paperwork for the Full Carry-Forward Period
If you carried part of the credit forward, you will need the original documentation to support it in future years. That means:
- The itemized invoice separating qualifying and non-qualifying costs
- The signed contract and any change orders
- The permit and final inspection sign-off
- The utility’s permission-to-operate letter with the activation date
- Form 5695 from each year you carried a balance forward
Store digital copies. Paper files from an installer that closed two years ago are one flooded basement away from gone.
The Mistakes at a Glance
| Mistake | Consequence | Fix |
|---|---|---|
| Claiming the bundled contract total | Overstated credit, correction letter | Amend with itemized invoice |
| Using contract date instead of in-service date | Wrong tax year claimed | Amend using utility activation letter |
| Expecting a refund instead of a reduction | Cash flow surprise | Carry unused credit forward |
| Assuming the 30% rate expired | Credit under-claimed or skipped | Recalculate at current rate |
| Ignoring state and utility programs | Thousands in unclaimed money | Build a program/deadline table |
| Missing utility rebate windows | Forfeited rebate | Submit within 60–90 days of activation |
| Overlooking loan prepayment terms | Extra interest paid | Confirm terms in writing |
| Discarding supporting documents | Unsupported carry-forward | Store digital copies for all years |
What to Do Next
Today: pull your itemized invoice, your utility permission-to-operate letter, and last year’s tax return. Confirm three numbers — qualifying cost, in-service date, and your prior-year total tax liability. If any of those is missing, request it from your installer or utility in writing this week.
Then check your state energy office website for the current list of state and utility programs, and note every deadline in a calendar. Most of the dollars lost on solar incentives are lost to a missed date or an unsupported number, not to a rule that changed.
Which step above is the biggest open question for you — the qualifying cost breakdown, the in-service date, or a specific state or utility program deadline? Share which one and we can help you work through it.
Related guides: The Federal Solar Tax Credit Explained for Homeowners, Solar and Battery Storage for Home Businesses: A Tax and Accounting Guide, and Common Solar Installer Mistakes Homeowners Should Catch Before Signing.
🔗 Recommended Reading
- How to Size a Solar System for Your Home: A Beginner's Step-by-Step Walkthrough
- Solar Panel Monitoring Apps: A Setup Guide for Beginners
- How to Read Your Electricity Bill After Solar: A Line-by-Line Walkthrough
- Solar Incentive Paperwork: Common Filing Mistakes That Delay Your Rebate
- Home Battery Sizing Mistakes That Lead to Blackout Regret